Showing posts with label Baking. Show all posts

Tuesday, May 5, 2015

Cinco de Mayo

Means.... Margaritas!

I'm hoping that my plan for a little family party tonight will work out.

Al Pastor Tacos, frijoles, cilantro rice, salsa, guacamole, and my famous
Margarita Cupcakes and
Watermelon Margaritas.


Check out the fiesta I threw my hubby HERE for a little more inspiration.

How ever you do up today... or any day... have a MARVELOUS time doing it!
HAPPY CINCO de MAYO, friends!

Wednesday, October 29, 2014

BAKING: Boo Bark

Everything seems to be closing in at warp speed.

My busiest time of the year, just seems to be getting a little busier.
Sorry, for my recent absence.... but, we had some family health issues that were at the priority of our days.... and nights. And even though I LOVE to paint and create, my family comes first. I'm sure y'all can understand. But, praise the Lord..... all is better than what we could have imagined!

So, back to business!

My friend posted a link on her FB page that contained a recipe for Halloween Candy Bark found here at Just a Taste. I decided to give it a shot for some of our lovely neighbors.  I altered a few things from the original recipe. I mixed bittersweet chocolate chips with milk chocolate chips. Plus, I added toasted pumpkin seeds. But, the great thing is.... you can add any candy... and ingredients. Have fun!

This was my take. I call them Boo Bark!


BOO BARK
Ingredients:
3 cups of bittersweet and milk chocolate chips
Kit Kat Bars
Reese's Peanut Butter Cups Quartered
M&M's minus the blue ones
Toasted Pumpkin Seeds 
Candied Boo Eyes


1. Toast the pumpkin seeds in a skillet over a medium flame until they begin to brown and start to pop. Remove from heat and let cool.

2. Line baking sheets with wax or parchment paper.

3. Melt the chocolate chips in either a double boiler or a microwave.
I did mine in the microwave, just don't over cook. It took my chocolate about 1 minute and 35 seconds and then I mixed the chips until they were all melted and the mixture was smooth.

4. Pour melted chocolate on baking sheets.
With a spatula, spread the chocolate evenly about 1/4" thick.

5. Start placing the candy, boo eyes, and pumpkin seeds into the chocolate.
I pressed the items a little into the chocolate.
The chocolate will start to firm up a bit, so this step should be done quickly.

6. Place the baking sheets into the fridge for 30-40 minutes until the chocolate hardens completely.

7. Carefully peel the wax paper away from the chocolate and place on a cutting board.

8. Cut the bark into pieces.

9. Place pieces in an air-tight container until they can be packaged and enjoyed!


This is how I festively packaged them for our neighbors.

I love how you can see the eyes peeking at you from the container.


Do you have plans to make any special treats for friends?
I'd love for you to share with me.

Happy Boo-Day, friends!

Wednesday, September 24, 2014

FOOD: Pumpkin Oaties

Autumn is one of my favorite seasons of the year.... well, to be honest... the start to any season is pretty much my favorite season of the year. But, autumn holds a special place in my heart thanks to all the warmth and coziness which is conveyed in the scents and food of the season.

So, what better way to get into the autumn spirit but with baking some Pumpkin Oaties!
This was our first PUMPKIN recipe of the season and I wanted to share it with you.

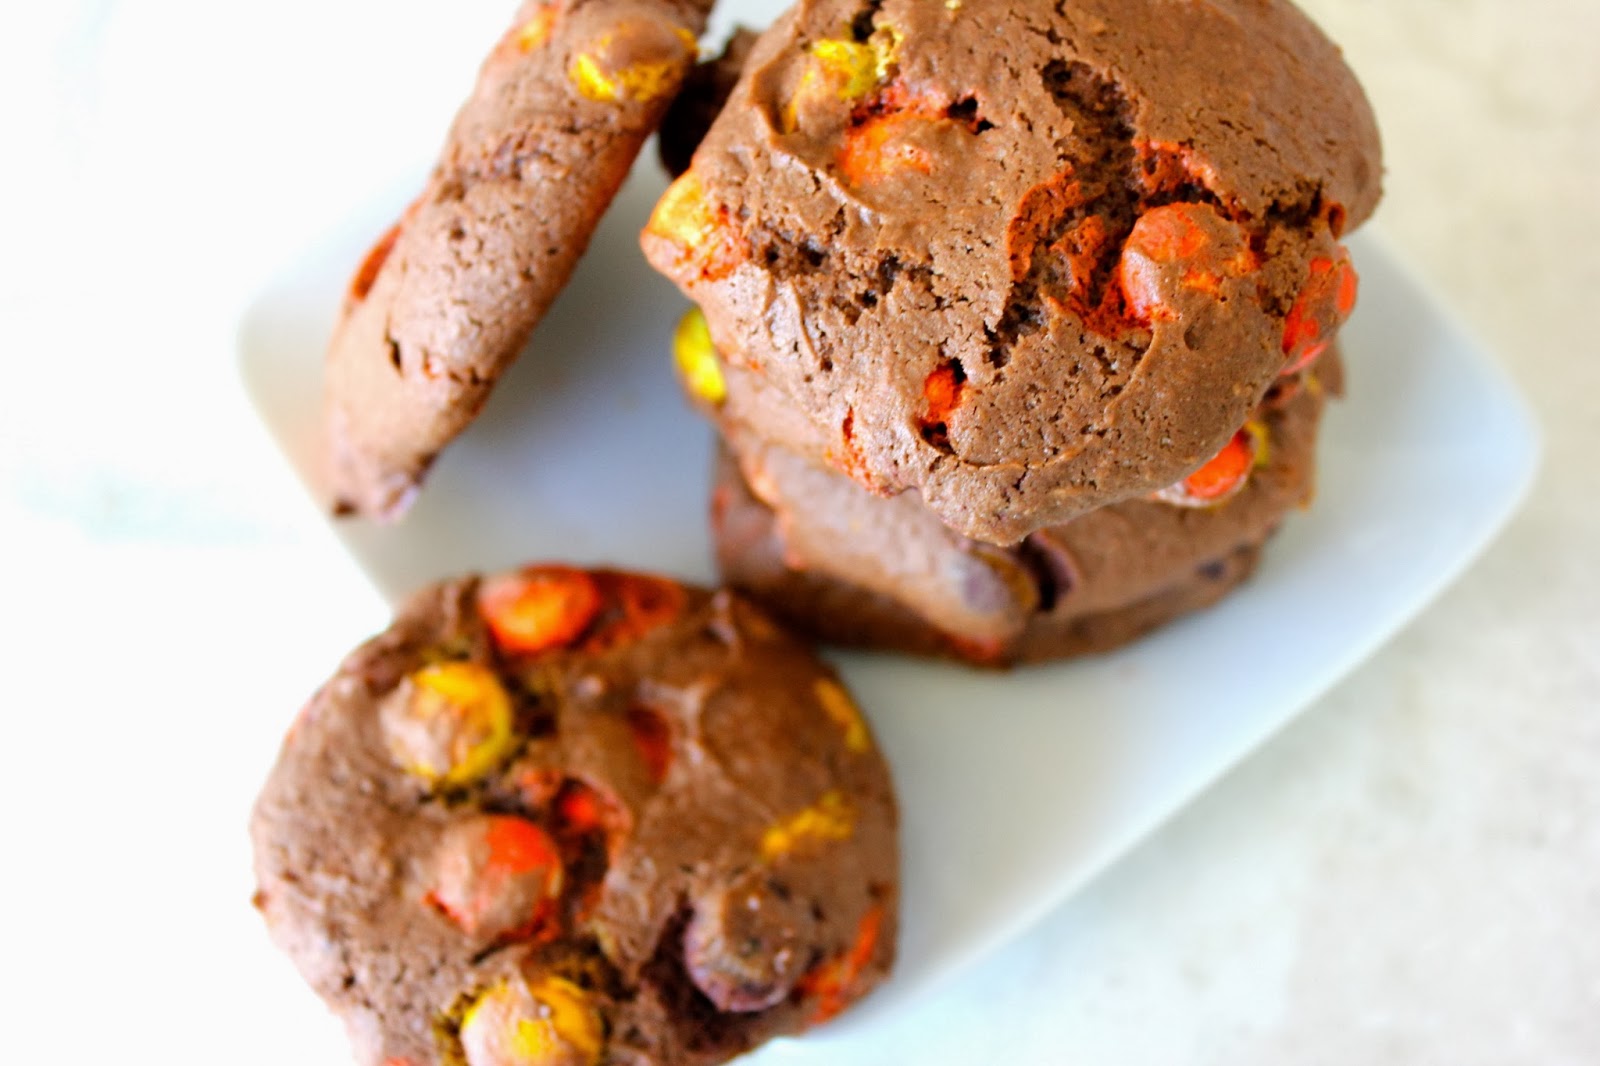
First off though, I was so excited about eating baking these.... that I only took one pic.
Here it is... in all it's Instagram glory:


Now back to the recipe.

I LOVE my cookbooks.
In fact, hubby frequently gifts them to me for special and "just because" events.
He knows my heart well.

And one of my favorite cookbooks is The New American Heart Association Cookbook 8th Edition. And that is where I received the inspiration [and recipe] for these pumpkin oaties. I just altered the recipe in several different areas and they still turned out great!

PUMPKIN OATIES
1 1/4 cups whole-wheat flour
        *Note: Altered from the TNAHAC's recipe of 1/2 cup whole-wheat flour.
1/2 cup all-purpose flour
       *Note: Altered from the TNAHAC's recipe of 1 1/4 cups all-purpose flour.
2 tsp pumpkin pie spice
1 tsp Feather Weight baking powder [sodium free]
       *Note: If not sodium free, use same amount baking powder.
2 tsp Ener G baking soda [sodium free]
       *Note: If not sodium free, use ONLY 1 tsp baking soda.
1/2 tsp salt
1 cup firmly packed brown sugar
1/4 cup unsweetened applesauce
       *Note: Altered from the TNAHAC's recipe of 1/4 cup canola or corn oil.
1 large egg
1 15 oz. can pumpkin
1 c uncooked quick-cooking oatmeal

Preheat oven to 350 degrees.

In a medium bowl, sift together the flours, pumpkin pie spice, baking powder, baking soda, and salt.

Put the brown sugar, oil, and egg in a large mixing bowl. Using an electric mixer on medium speed, beat for 2 to 3 minutes, or until smooth. Beat in the pumpkin until smooth.

Stir in the oatmeal. Gradually stir in the flour mixture, about one-third at a time, gently blending until no flour is visible.

Using a small 1 Tbsp spring-loaded ice cream scoop or tablespoon, drop the dough by tablespoonfuls on to a lightly sprayed baking sheet. Dampen the heel of your hand and lightly press each cookie to flatten slightly. The cookies don't spread as they bake.

Bake for 14 to 18 minutes, or until the cookies appear dry. Transfer the cookies from the baking sheets to cooling racks and let cool.

I was able to make 30 cookies with my altered version of the recipe.

Nutritional value per cookie according to "MyFitnessPal":
Calories 59 | Fat 0.2g | Sodium 54 mg | Potassium 74 mg | Carbs 13 g | Fiber 1 g |
Sugars 7 g | Protein 1 g | Vitamin A 33% | Calcium 8%

Such a yummy special Fall treat!
Happy Fall Y'all!

Tuesday, December 10, 2013

Chocolate Peppermint Cupcakes

We have been iced in for several days...

But, today things are getting back to normal. 
It'll be above freezing soon and the rest of the ice will melt. 
We plan to venture out [doctor appointment and what not] for the first time since Thursday morning!

We have really enjoyed our time entombed in ice. For real.
We are introverts at heart.

Not to mention, I was able to complete an insane amount of Christmas preparations!

Plus.... I got to bake these cupcakes!
I shared them last year in a post, but here is the recipe again:


CHOCOLATE PEPPERMINT CUPCAKES
Prep Time: 25 minutes | Bake Time: 22-25 minutes
Yield: 20-24 cupcakes
Chocolate Cupcakes:
1 3/4 cups cake flour
2 cups sugar
3/4 cup unsweetened cocoa {I used Ghirardelli}
1 teaspoon salt
1 1/2 teaspoon baking powder
1 1/2 teaspoon baking soda
2 eggs at room temperature
1 cup milk {I used non-fat and they still turned out great}
1/2 cup vegetable oil
2 teaspoons vanilla extract
1 cup boiling water

Peppermint Cream Cheese Frosting:
~7 ounces cream cheese softned
1/2 cup butter {1 stick}
1 1/2 teaspoon pure peppermint extract
1/2 teaspoon vanilla extract
4 cups confectioner sugar
1-3 Tablespoons milk 

CUPCAKES
1. Preheat oven to 350 degrees and line cupcake pan.

2. In mixing bowl, stir together flour, sugar, cocoa, baking powder, baking soda and salt.

3. Add eggs, oil, milk and vanilla and beat on medium speed for 1 minute.

4. Add boiling water and blend together. 
NOTE: the mixture will be VERY thin. I am thankful I was warned about this because it really is the consistency of buttermilk or so. But, don't worry. They turn out fabulous! But, instead of using an ice cream scoop to fill my liners, I just used a bowl with a pouring spout.

5. Fill liners 2/3 full with batter.

6. Bake at 350 degree for 22 - 25 minutes.

7. Cool cupcakes completely on wire rack prior to frosting.


FROSTING
1. Beat cream cheese and butter for about 30 seconds until smooth.

2. Add confectioner sugar a little at a time. Once combined increase speed to medium and beat until fluffy.

3. Add peppermint and vanilla extract and mix until combined.

4. Slowly add in the milk until you reach the desired consistency. 

5. Beat until fluffy {about 1 minute}.

Makes approximately 3 - 4 cups.
Utilize frosting immediately or it can be stored in the refrigerator for several days.

Frost cupcakes and ENJOY!


I added Hershey Peppermint Kisses to the top for an added festive punch.


And then I had fun breaking up a whole bunch of candy canes to sprinkle around the serving platter. I just spread the fine dust left from the candy canes across the top of the cupcakes.


ENJOY!

Thursday, November 21, 2013

FOOD: Reese's Pieces Cookies

As promised from this post about our 80's themed birthday party...

The Reese's Pieces Cookie Recipe!

Quick.  Simple.  SCRUMPTIOUS!


INGREDIENTS
1 Package of Super Moist Milk Chocolate Cake Mix
2 eggs
1/2 cup of Canola Oil [or 1/3 cup applesauce]
1 bag Reese's Pieces

DIRECTIONS
1. Preheat oven to 350°.
2. Combine cake mix, eggs and oil in mixing bowl. Beat well.
3. Gently stir in Reese's Pieces.
4. Drop onto ungreased cookie sheet in round balls.
5. Bake for approximately 8-10 minutes [or until done].
6. Let cool and ENJOY!


These cookies taste SO good!
And... they are so simple to make... plus, they freeze well.

Perfection!

Thursday, August 29, 2013

FOOD: Lemon Cakeballs

I made these for a Baby Shower awhile back... these cakeballs are SO easy to make.


I was always hesitant about making some, but when I saw the recipe... I thought, "How hard can it be?"

Fortunately, not hard at all!

A little messy yes.

But, hard... NO!


LEMON CAKEBALL RECIPE
1 box Lemon Cake Mix
1 tub Lemon Frosting
2 packages of Almond Bark
1 package of Colored Candy Melts {I used yellow}
  • Prepare cake according to package. Let cool completely.
  • Break up prepared cake in a large bowl.
  • Add the tub of frosting and mix well {I used my hands}.
  • Form into balls and place on a lined cooking sheet.
  • Place in freezer for about 1 hour.
  • Melt Almond Bark according to package instructions.
  • Dip frozen cakeballs into melted almond bark and place back onto lined baking sheet to harden.
  • Once cakeballs are harden, prepare yellow candy melts and drizzle on cakeballs to decorate.

The possibilities are endless. 
I have made this recipe with strawberry cake mix and frosting. They were DELISH, too! 

These cakeballs are quite moist and VERY rich... They are sure to cure any sweet tooth craving.


ENJOY!

Tuesday, August 20, 2013

FOOD: Healthy Banana Blueberry Bread

I'd like to share with you a recipe I morphed from about 5 different recipes created:

HEALTHY BANANA BLUEBERRY BREAD! 


And when I say healthy... I mean

whole wheat.... oats... fruit.... low sodium... low fat.... no added sugar {Truvia was used}....

YUMMY!

And not bad for your thighs.

And believe me, this bread IS yummy! It actually got a huge stamp of approval from the hubsters... as actually being something he assumed I purchased at the bakery. Whoah.... that's a huge compliment {on a healthy bread}!

It all started with the standard pathetic looking mushy bananas.

Most of you know how this story ends..... typical fate of said bananas = Banana Bread.

No different here.


But, I looked in my fridge and I had some blueberries I wanted to use too.

So, I changed it up a little bit and added a few other companions to the mix!

INGREDIENTS
3 mashed very ripe bananas
1 cup blueberries
1 cup whole wheat flour
1/2 cup all purpose flour
1/2 cup quick oats
1/4 cup Truvia
2 1/2 tsp sodium free baking powder {Featherweight}
1/8 tsp salt
1 tsp cinnamon
2 egg whites
1 egg
1/2 cup unsweetened applesauce

DIRECTIONS
1. Preheat oven to 350 degrees.

2. Sift together all dry ingredients {except oats}.

3. Add oats to dry ingredients and mix together until well combined.

4. In a separate bowl, mix together applesauce, eggs and bananas.

5. Add blueberries to the wet mixture.

6. Gently mix the wet and dry ingredients together and pour into a greased {spray with Pam} loaf pan.


I added some blackberries to the top of the loaf.

7. Bake for approximately 1 hour at 350 degrees.
{Check with toothpick to verify loaf is baked all the way through.}


ENJOY!

Store bread in refrigerator for a couple days {if it lasts until then}.

HEALTHY BANANA BLUEBERRY BREAD! 

Your thighs can thank me later...

unless....

of course you eat this warm bread with some vanilla ice cream....


.... then.... not so low fat. Ha!

Thursday, May 30, 2013

PARTIES: Adult Circus Theme

In our household, summer means gifts for the hubby.... Every. Single. Month.

Truly.

Father's Day --- Anniversary --- Birthday

That means that my mind is racing with gift ideas for the hubster. Hence, it got me thinking to his Birthday Party last year.... so, I thought I would share it with y'all. 

We decided to start a new tradition last year. We would attend the Greatest Show on Earth every year for the hubby's birthday {it comes to town just across the street... and there is a show every year on his actual birth date... why not?!}. But, the question remains: Do I hold a Circus Themed Birthday Party for him --- every year? Well, we did last year.


And we don't take celebrations lightly around our Double-Wide in the Sky. Oh, the pressure!

Looking back at last year, kiddo decided we should hold a party for our favorite man. And since... we were planning to go to the circus on his birthday {hence the start of the tradition}.... we decided the theme of the party would be a CIRCUS theme. And the color scheme would be a little bit more masculine: black, white and red.

So, we went to work planning this elaborate celebration for a small "intimate gathering" {as kiddo called it}.

First job was creating the guest list. We didn't want to go all out since we were planning to head to the circus by a specific time. So, we decided to invite the hubby's co-workers for a Birthday Happy Hour. Which is perfect because my hubby works with some AMAZINGLY cool and AWESOME people. Which makes for a fantastic party guest list. It was also perfect.... because hubby works just across the street. So, people walked over when the Happy Hour started and walked back when it ended. PERFECT.

Next was creating decorations.

This was the VERY fun part.

Balloons - check
Streamers - check
Banners - check


Clown Noses... Mustaches....


CHECK and CHECK!


Ha! These mustaches were super easy to create. I found the fuzzy adhesive mustaches at Party City. I simply cut a larger mustache out of black cardstock and adhered the fuzzy mustache onto said cardstock mustache and then adhered it to a candy stick using glue dots. Easy-Peasy and super fun! I also created some lips... better to kiss you with my dear....


While I was at the party store... I found some carnival tickets. And the idea to use them as a simple cupcake topper hit my brain. It turned out AWESOME and it was super quick!


I also used the tickets to decorate the straws, along with some red and white striped paper.


Believe it or not, I had picked up these paper straws at ZGallerie. They were on clearance. So naturally, I cleaned them out of their inventory. I just thought the gray and white would be so versatile. I was right! 

Next came the cake topper.... again I used the carnival tickets and a little souvenir I brought back from Guatemala.


I hung black, white and red decor from the windows. It gave somewhat of a Big Top tent feel. That's what I was going for without the work of creating fabric {or plastic table clothes} to drape into the center of the room. This was clean and simple.


Next up was the menu.

Since it was a Happy Hour, I wanted to have some heavy appetizers. Especially since I didn't want to spend all that extra $$$$ at the circus on gross food {which sometimes you just have to have}. So, I decided to stick with the circus theme.

CIRCUS THEME MENU
Hot Dogs {of course!}
Caprese Salad on a Stick
Roasted Peanuts
Popcorn
Strawberries
Circus Marshmallow Peanuts
Cotton Candy
Home-made Whole Wheat Pretzels 
Chocolate Cake
Margarita Cupcakes {for the adults only}

and of course.... adult beverages and fun kiddo drinks.


I simply folded down small lunch sacks and tied a carnival ticket with baker's twine for the roasted peanuts. And BTW, it was quite difficult to find the roasted peanuts with the shells. I ended up finding them at the liquor store... of all places! But, I guess it does make sense.


It was great to have a light and refreshing component to the menu.... but something with protein. The caprese salad was an easy solution that was also brilliantly displayed. Mozzarella balls, grape tomatoes, basil and some balsamic vinaigrette.  My kiddo thought the "lettuce" was the best he had ever tasted! Perfect!


Strawberries were also a nice alternative. Although.... I think only one was eaten.


The popcorn was devoured.... and how fun in the little popcorn containers.


I used the same craft paper to create the cones for the cotton candy and the water bottle labels.


The Blue Cream Frostie Soda.... is my hubby's favorite. So, we had to have some of that on hand at the beverage station!


I always like to create a luxurious set-up with the beverage station. It's adds an extra dose of fun... creating your drinks with festive little straws, fruit and quirky elements.


Hot dogs were a piece of cake! Popped them in the slow cooker on high for 2 hours and then turned down to warm for the party. Cooked well and tasted great! I had a selection of whole wheat and white hot dog buns. A little relish for those who like the extra kick. And of course, I had to be a little festive with the ketchup and mustard. {These containers will be fun to keep on hand.}


The pretzels were SO delish! I don't know how they keep after a day. They were all eaten. Several by... yours truly. They were seriously good!


So, that's how kiddo and I put together a little Circus Happy Hour Birthday Party for my hubby... last year.

A whole lot of LOVE and FUN went into this shindig!

I have to say....
I think it was...
The Greatest Circus Happy Hour Birthday Party on Earth!

Now.... Do I do it AGAIN this year?
I simply can't do the same thing twice.... your thoughts?
 
BLOG DESIGN BY DESIGNER BLOGS